NaBloPoMo
November 8
This print run congealed my relationship with my sweet little poster press. Since I acquired the press, I have only done a few small print runs. Figuring out how to register my imagery and hand ink consistently had tripped me up. However, after having taken Karen Kunc‘s class at PBI this past year, everything changed! Karen is a brilliant, Nebraska based, print maker and hand inks her prints with absolutely stunning results! I have not yet posted about PBI, but suffice it to say that Karen’s class made a big impression on the way that I will make prints…pun intended.
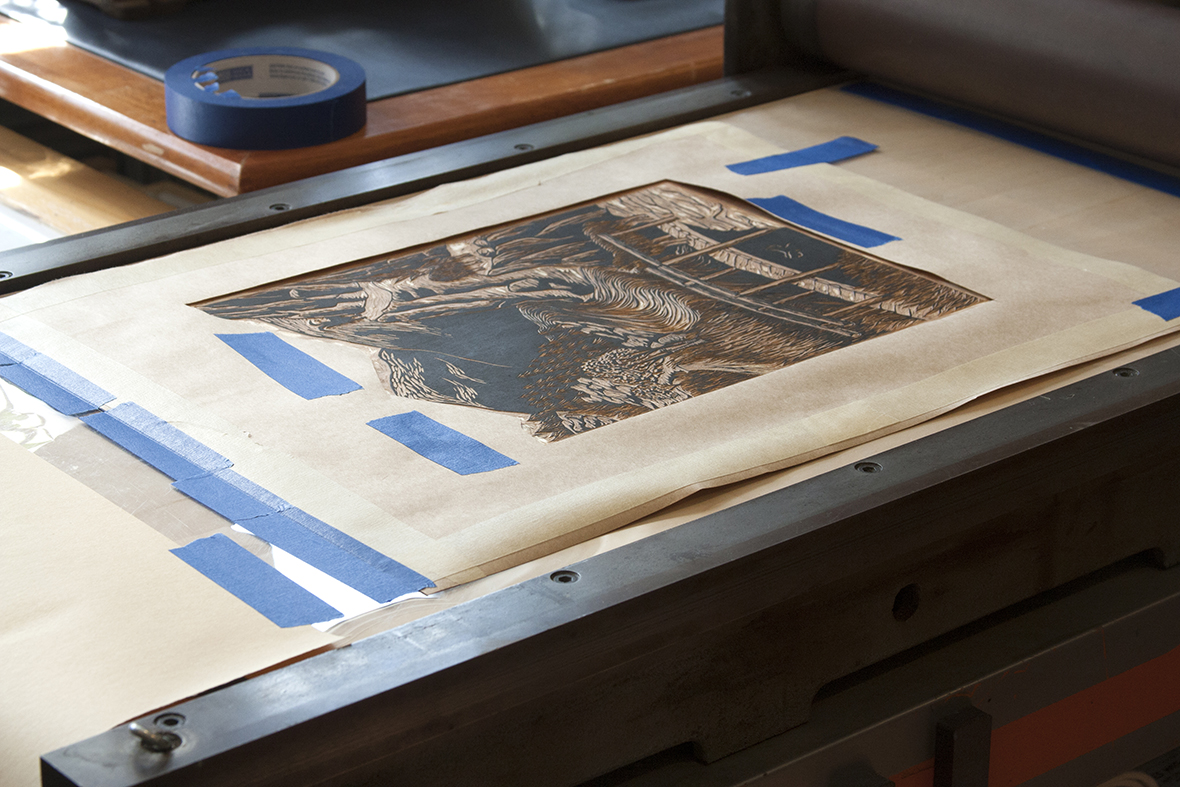
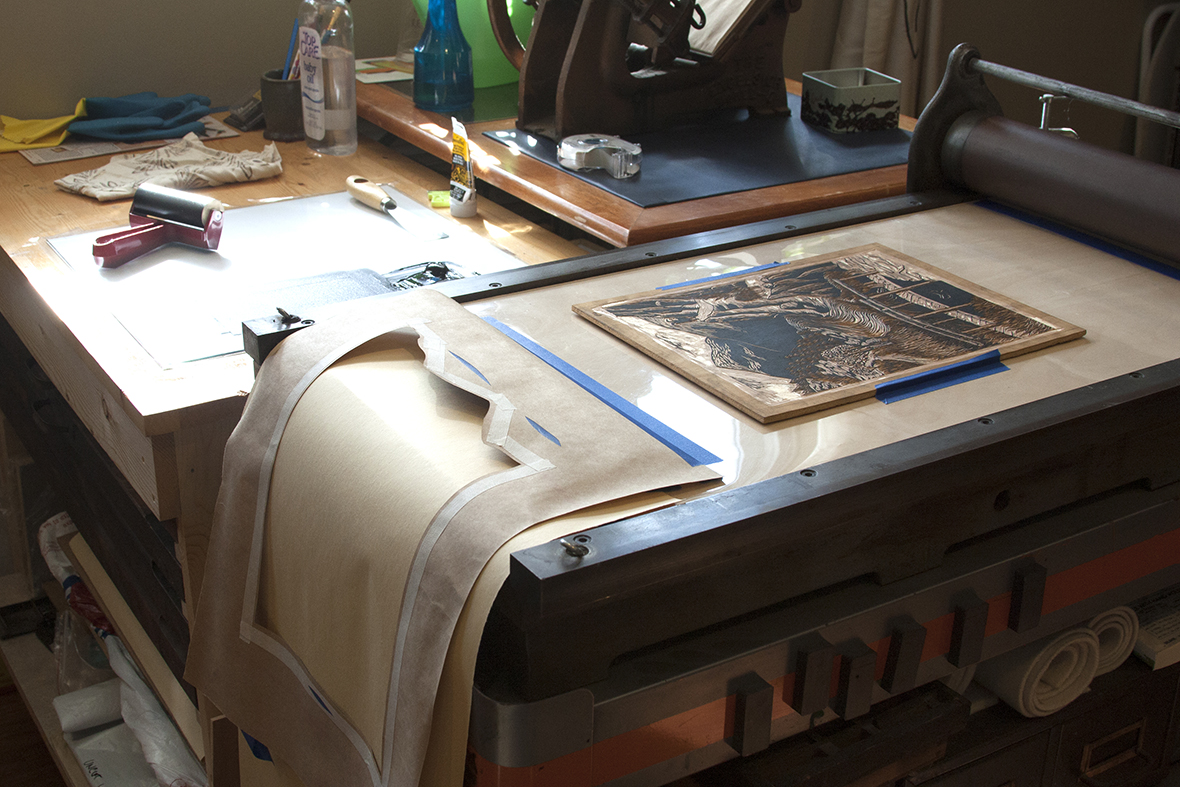 The image above shows my block sitting in the bed of the press. The woodcut is done on 1/4″ plywood, so in order to get it type high (the height that something needs to be in order to print on this press) I use a piece of 3/4″ furniture plywood cut to the size of the press bed as my base. I then taped a piece of acetate down, which serves a few functions: it protects the smooth wooden surface from getting dented or scratched, provides easy clean up, and is a great surface to tape or spray adhere things to during the printing process.
The above photo shows that the block is taped to the acetate using painters tape. If you look closely, you can see that the block is bowed a little bit. This is not a problem when you are printing on this type of press…just tape it down in the middle and let it rock! If it was more dramatically warped, I would have put it under weight over night to flatten it out.
A quick note about the tape on the block: it doesn’t extend into the area that my paper will be. If it did, it would emboss the paper where they overlapped, which would not be ideal for the final print.
 Next, was to prep the area for inking. One of the challenges I faced, lets say “pre-Karen”, is that during the inking process, I would get ink on areas that I wanted to stay clean. Karen’s simple yet genius solution is to create a mask with craft paper (She uses this technique, in her own work, to apply color to multiple areas of a block in a single run). The edges of the craft paper stencil are reinforced with masking tape to hold up to the repeated inking. This also has the added benefit of saving time during the cutting process. I didn’t have to go crazy cutting away the margins around the print so that they wouldn’t get accidentally inked.
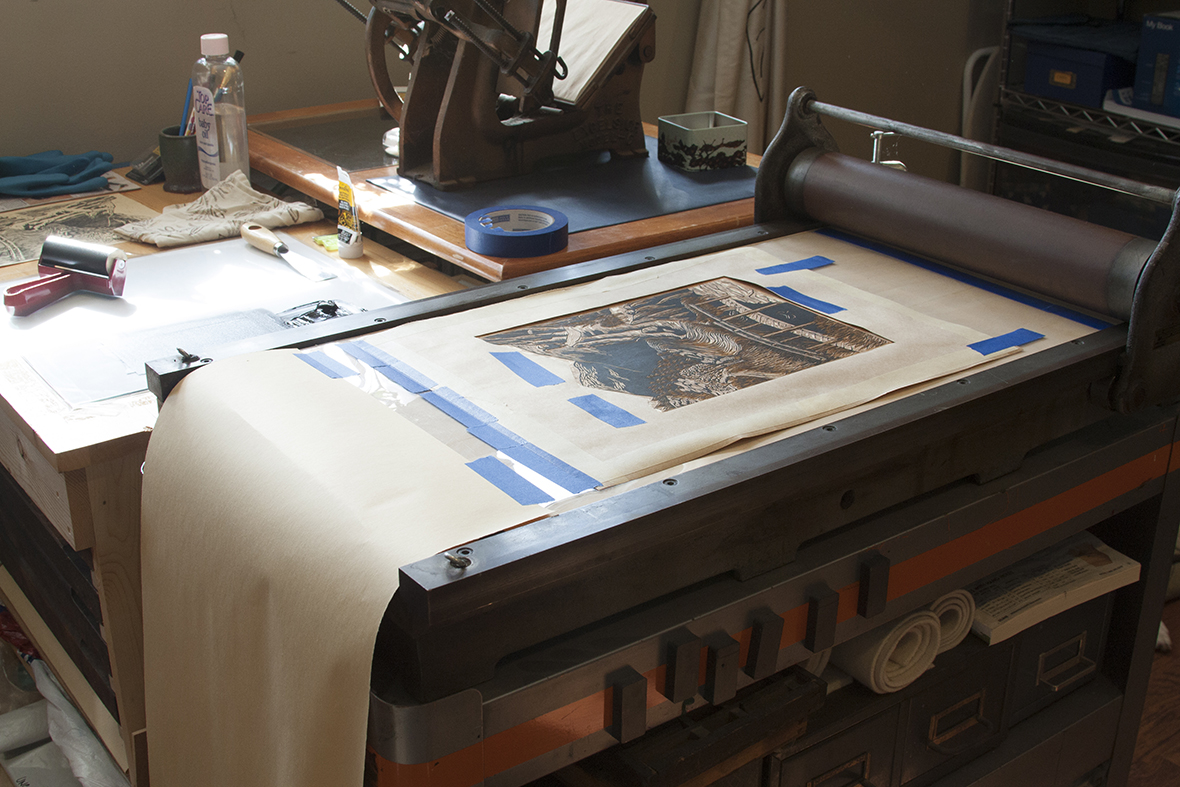 I made a modification to the stencil idea for my own press set up. I hinged the stencil to the press with a line of painters tape on the front and back of the stencil. This way, it is much easier to lay the stencil down in the same place each time without wasting too much time getting it lined up. The far edge of the mask is stabilized with two pieces of tape folded on themselves for easy removal. The final detail of this system is to tape down a piece of scrap paper to hang over the edge of the press where the inked surface of the stencil will lay when not in use. This might make more sense in the next few photos.
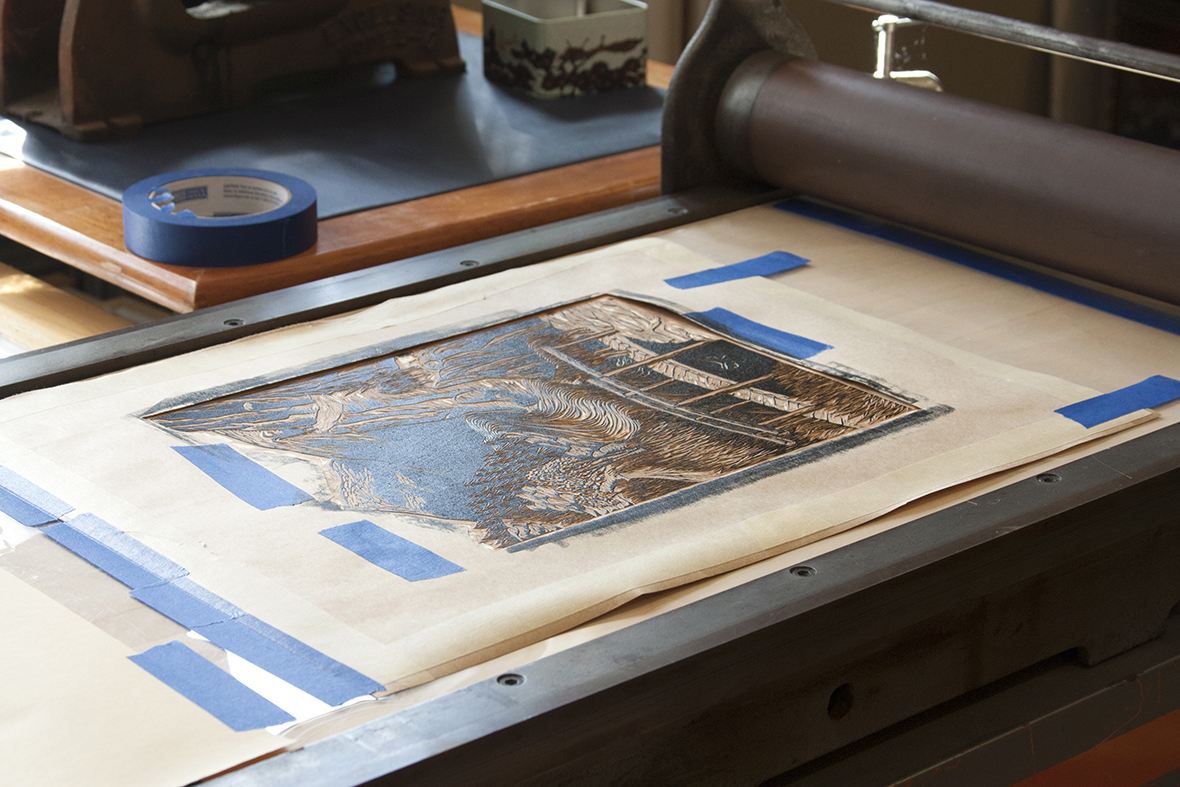 Here, the block is inked. You can see the areas of the stencil where the perimeter of the paper mask has gotten ink on it, but not my block! Once the block has been uniformly covered, the mask is pulled up and draped down off the edge of the press. A piece of paper is laid down on the registration lines I have marked on the block, and a thin press board is placed on top.
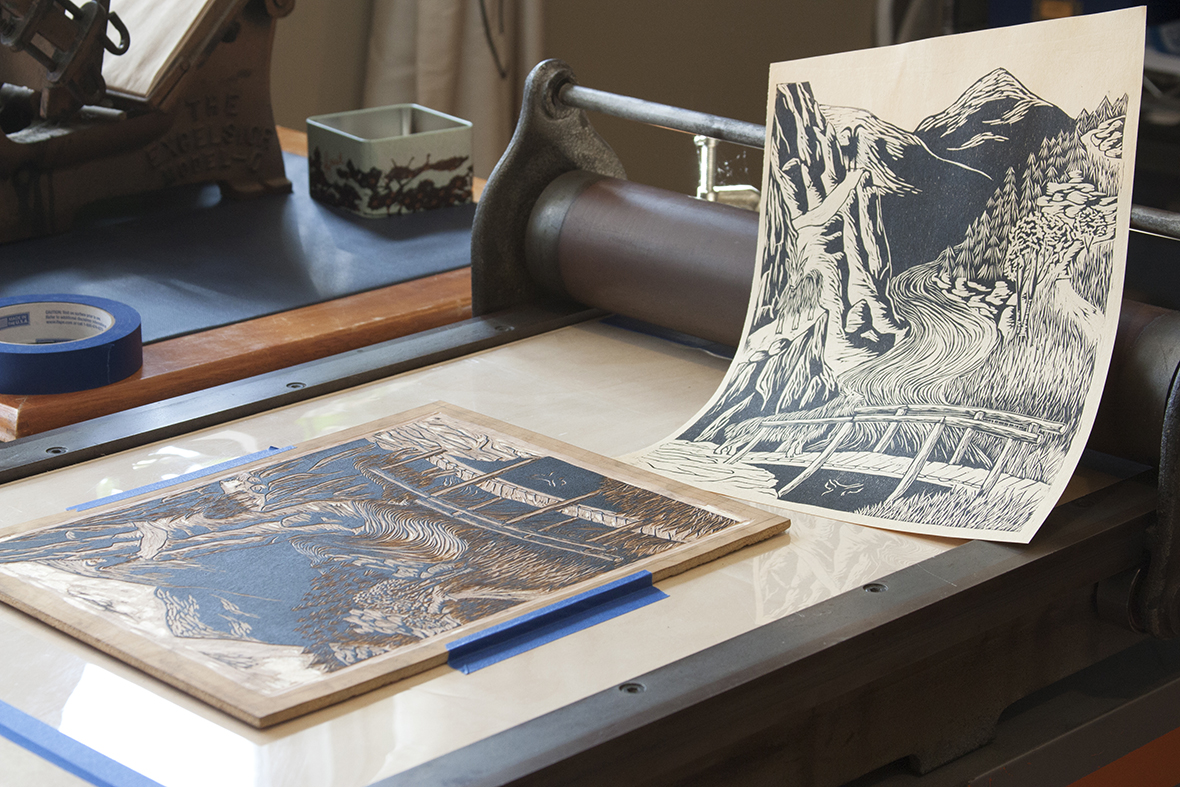
The piece is printed and viola! The above print is just a proof on low quality drawing paper to make sure that my pressure and inking is correct. The complete run was done on Andrea Peterson‘s white Martin drawing paper which accepted the ink and the process beautifully. A great paper makes a big difference!
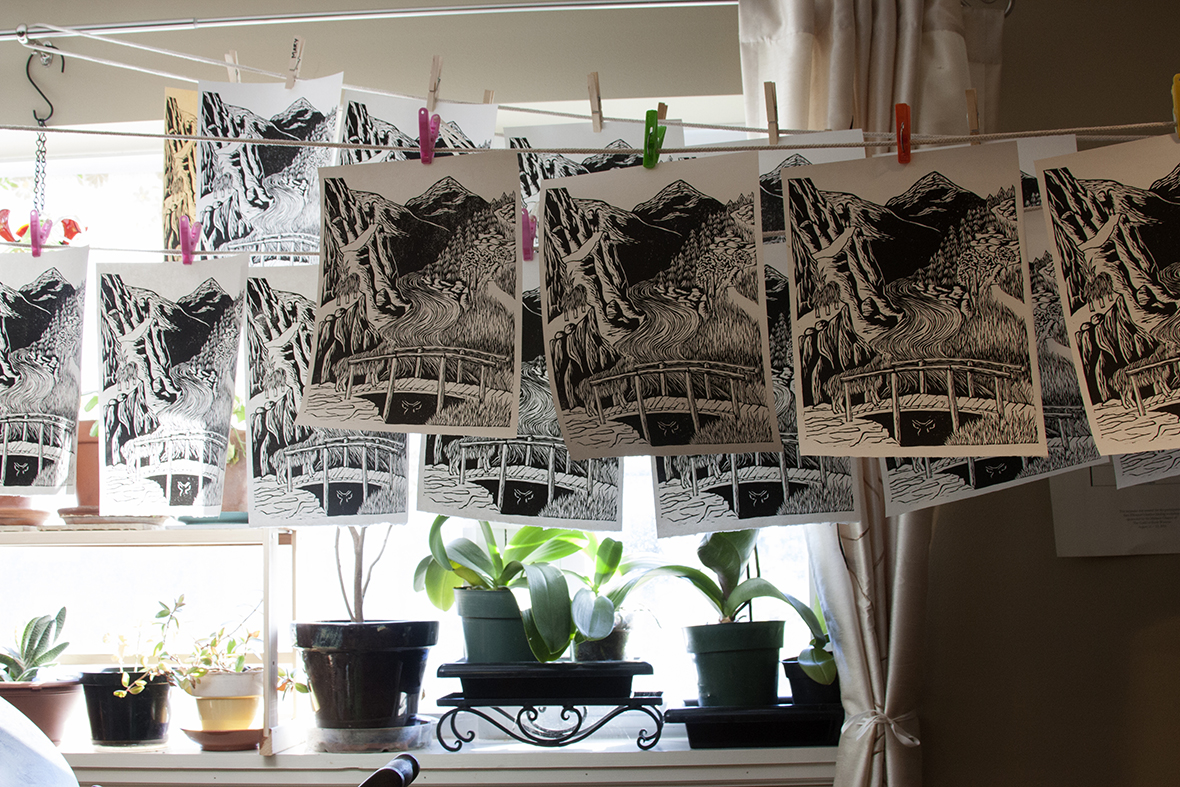
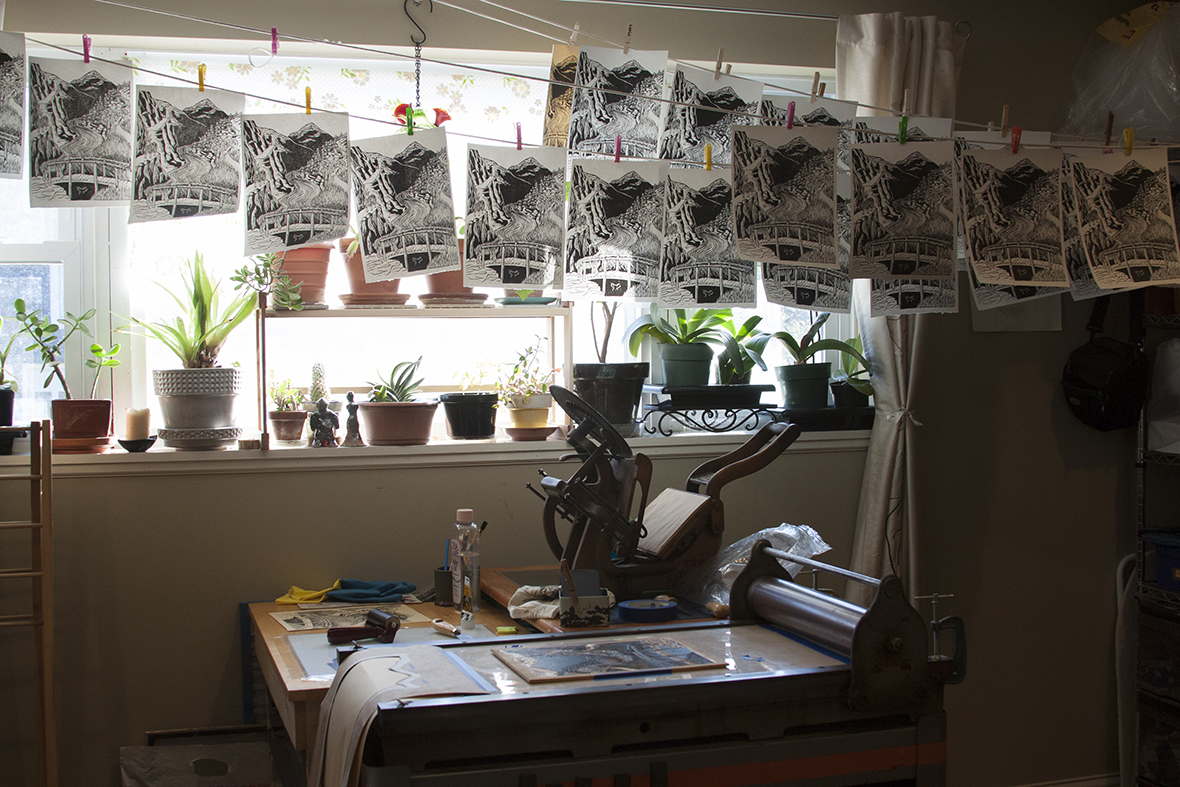 Finally, the edition was finished and hung in the studio to dry. They will all be signed and the best will go to the Bridges print exchange exhibit.