Lined paper. How many people have searched and searched for this paper that was not only wide enough (in the right direction) but also had a grain direction that was correct as well? I am one of these people…I am still on the lookout for this unicorn of bookbinding materials. However, in the meantime, I have come up with a few ways to address this problem.
printed lines
This is probably the most logical response to the lined paper issue. A quick document can be created in Word, Excel, or any other program that is fully customizable to fit your needs. Thickness of line, color and distance between the lines is up to you. You can run most papers through your printer so you have some freedom there as well. I used this method in the reporter notebooks made a few weeks ago as well as some small sewn journals I’ve made in the past.

Limitations with this method:
Paper Size. You can do just about anything you want with the document you choose to set up, however, you are limited by your printer. For example, most printers do not print much larger than 8.5 x 11 inches, so your book pages will have to remain within this size limit.
Registration can be tricky with printers as well. I know that my laser printer has a tendency to pull in paper on a slight angle unless I stand in front of it and guide the feed with my hands. So if you are binding these sheets and don’t want them to meet at a V in the gutter or you want them to match front to back, do some testing first.
Durability. A test run is always good to do on your paper before you print your whole run of 50 sheets of paper. Laser printer ink will occasionally flake off. This you may not see until you start folding and sewing your pages. Likewise, ink-jet printer ink can bleed on a paper that is not sized very heavily. So do a test sheet just in case and rough it up a bit to be sure it will stand up to daily handling.
a print out behind the page
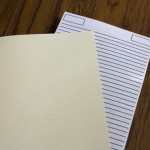
This is, I would say, the easiest way to solve this problem. All you do is print out a piece of lined paper that will be placed behind the blank page that you are writing on. I’ve handed these out with lots of journals I have made in the past. Some people I know will not even attempt to write on a page without some guides.


The benefit of this method is that your potential lined page expands to the full 8.5 x 11 inch paper as opposed to the half-size alternative. I use a computer paper, which come in a range of colors, so that the ink will not rub off or bleed. If your lines do wear out over time, you can always print off a new one!
Your paper options are also very open. The entire book block can be composed of any paper you want so long as you can see the lined paper behind it.
Stencil method
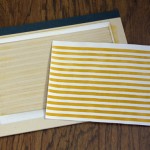
Using the stencil method, you have a few extra freedoms. Your paper can have texture, can be thick or very fine since the stencil is laid on top of the paper. The paper is not fed through a printer and does not need strength of its own. The end result is a unique set of lines that is not going to be exactly the same throughout. This is part of the appeal of the hand applied process; very organic.
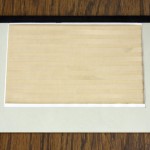
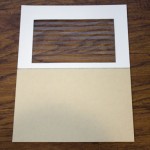
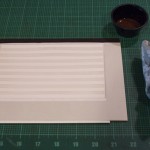
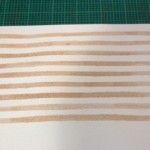
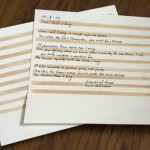
Below is a stencil I made that allows me to register the paper to lay in the same spot each time. In the examples here, I used a bright color to show how the stripes of line appear on the page. However, subtle colors work the best so as not to be too distracting from the writing. White on white can be really great in this way.
Things to remember with this method:
Paper absorbs ink and paint very quickly so do a test on a piece of the paper you plan on using to see just how much the ink/paint will react.
Try a few methods of applying the color. Brush with bristles, sponge brush, rag, roller. They all react differently on the paper.
You may also try to spray the back of the stencil in order to keep it close to the surface of the paper. Remember that fine papers could react negatively and fibers may pull up once separated from the stencil.
Finally, this takes a considerable amount of time to do. So you may not want to try this for a 250 page book…